EC2 Configuration
EC2 Configuration
- Navigate to the AWS Directory Service management console => choose the created Directory Service => save the DNS Address
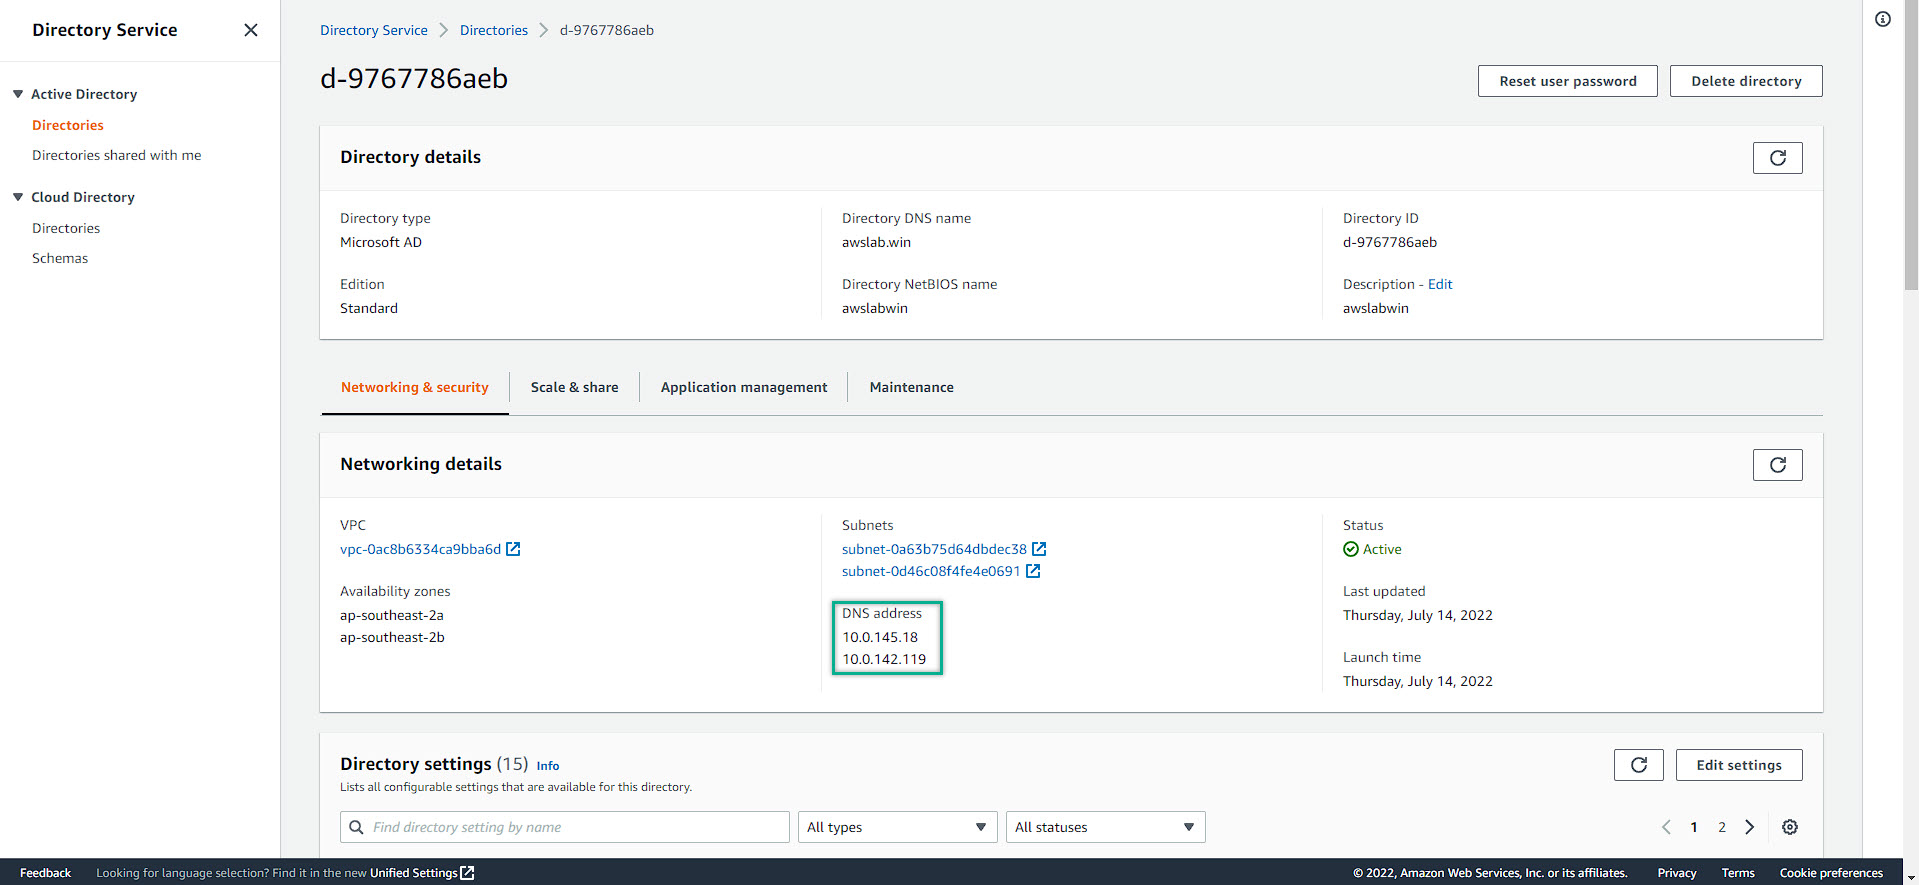
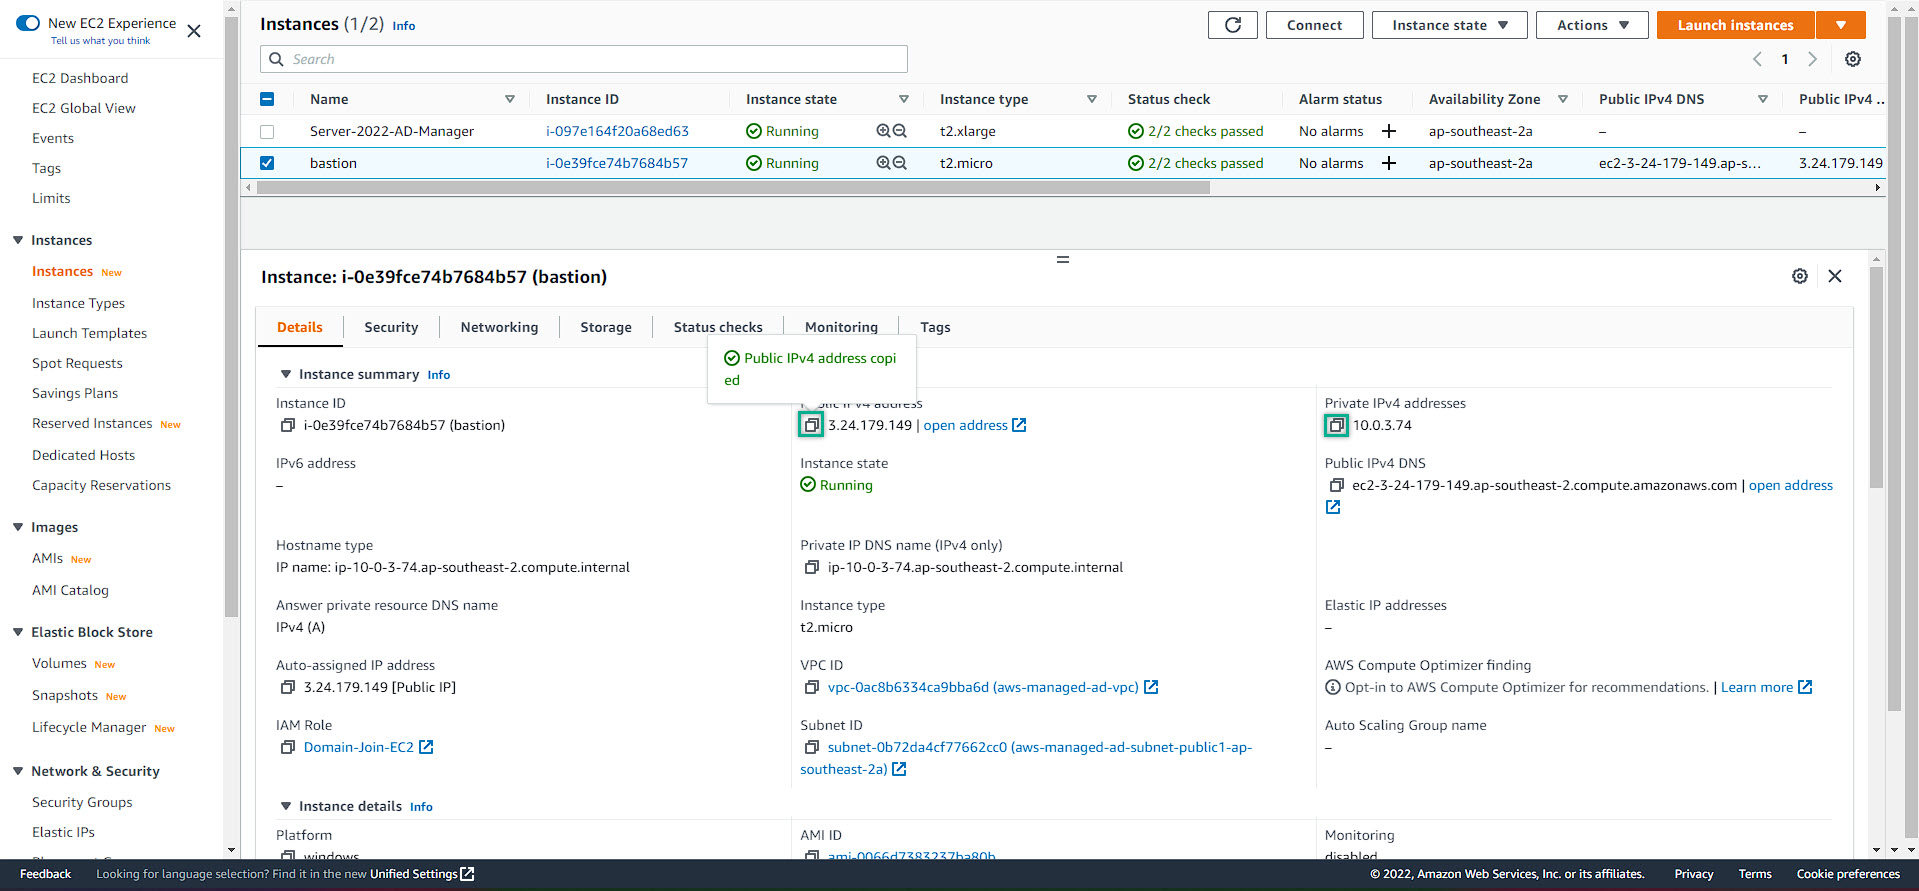
- Navigate to the EC2 Management Console => save ALL of the both public and private ip address of ALL EC2
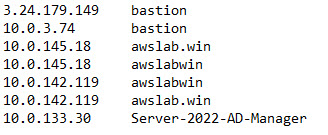
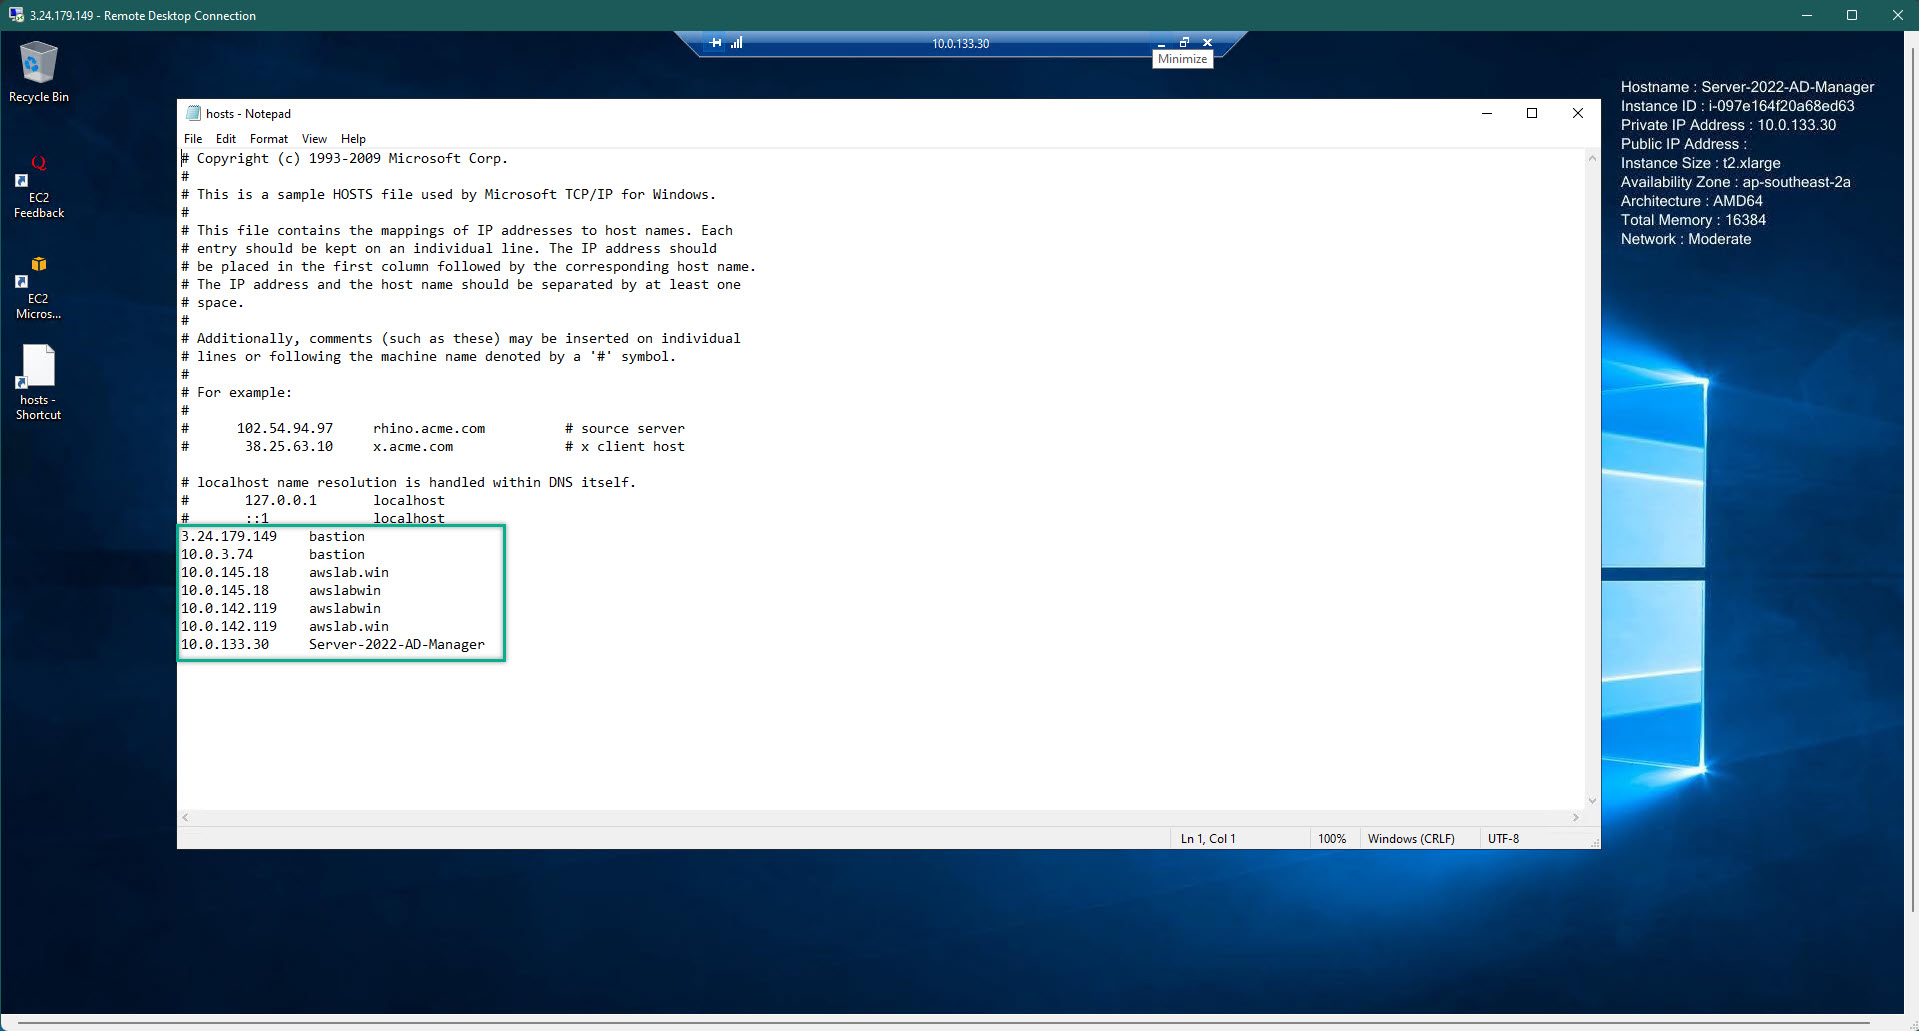
- We will have a temporary notepad file like this
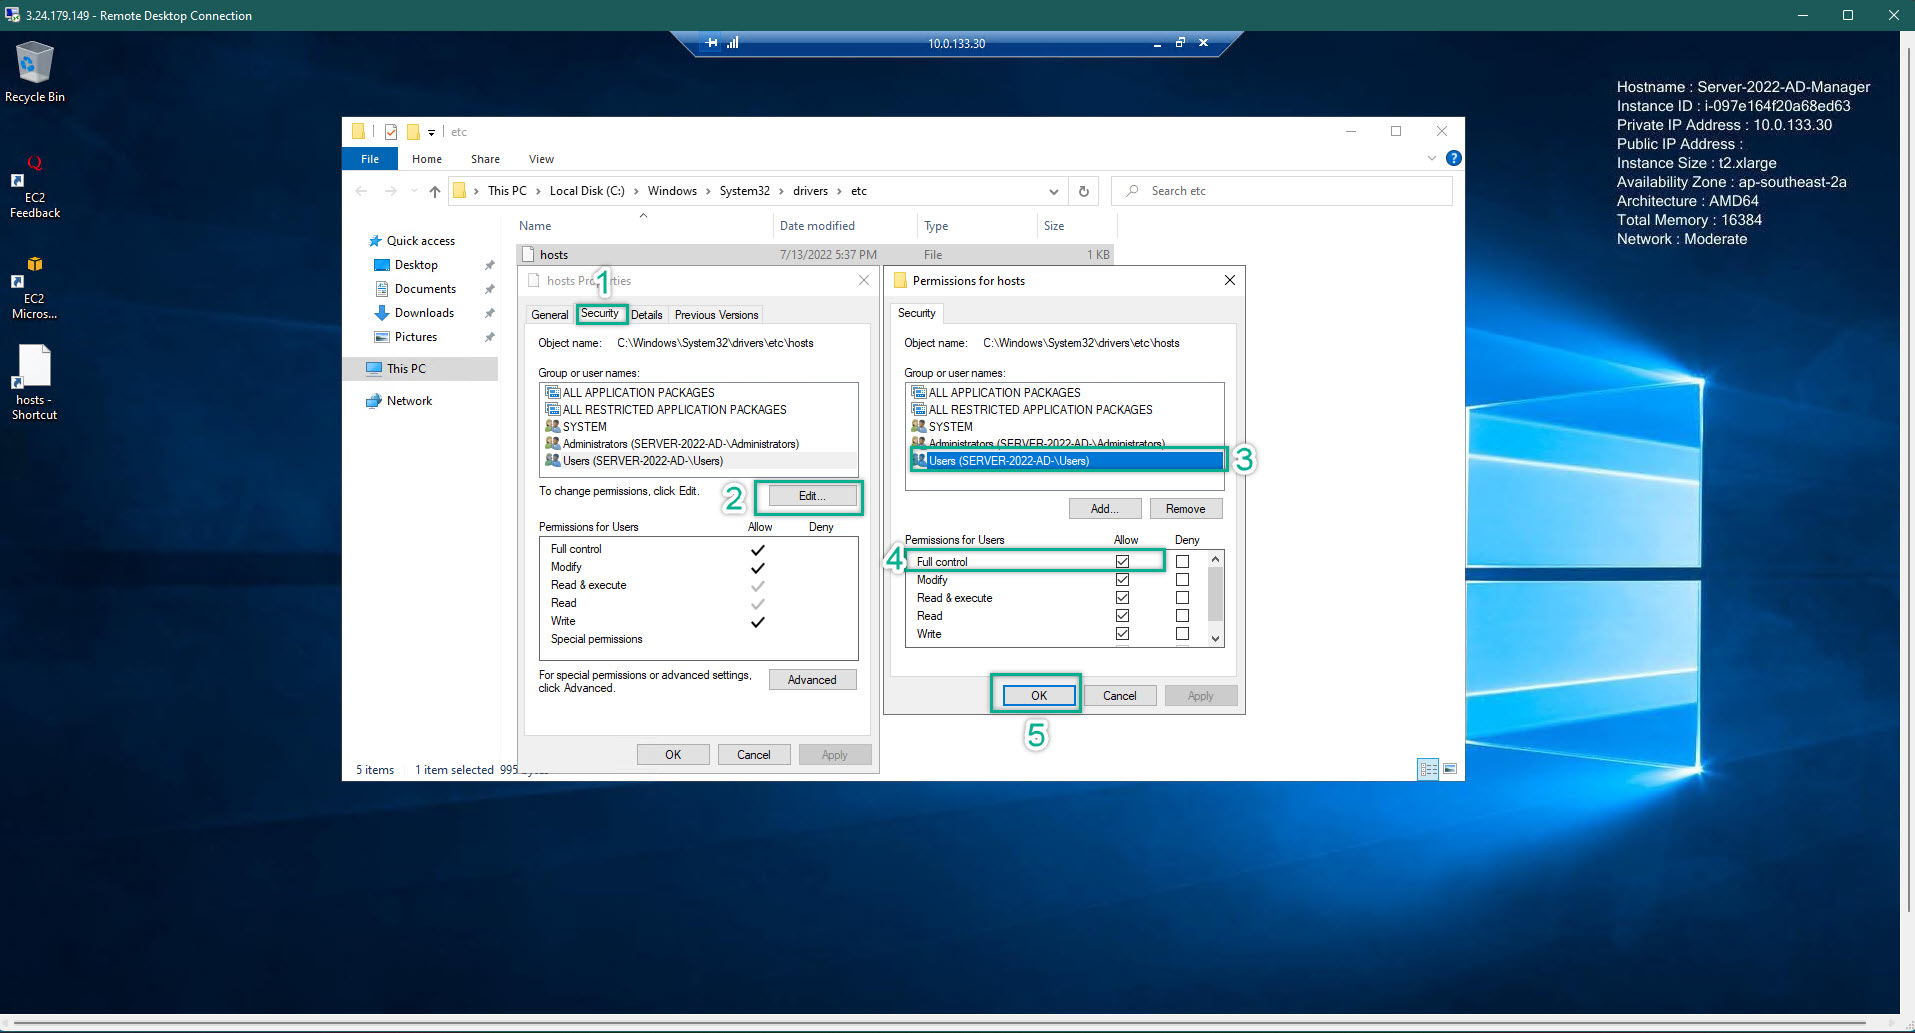
- Edit your hosts file on ALL EC2. Remember, before edit the host file, you need to grand the permission so the that file can be saved. Host file is located at C:\Windows\System32\drivers\etc
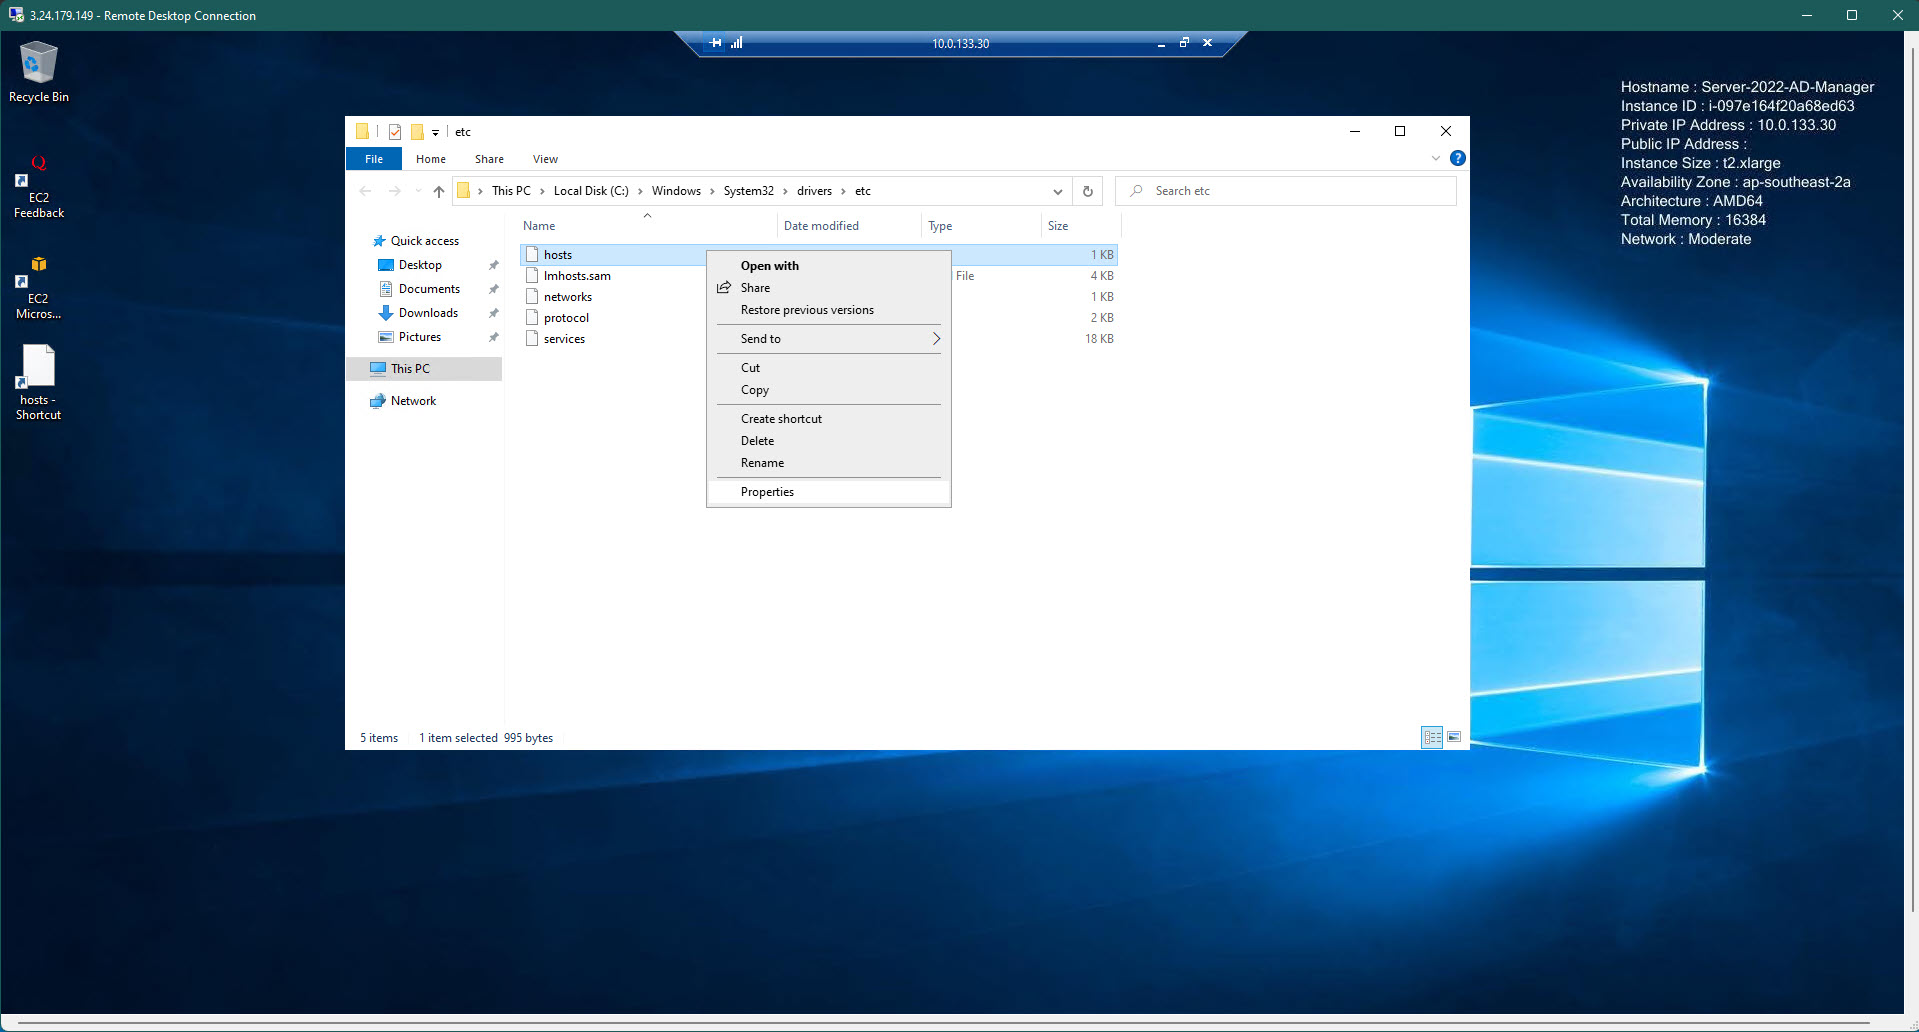
- The hosts file of all EC2 should look something like this
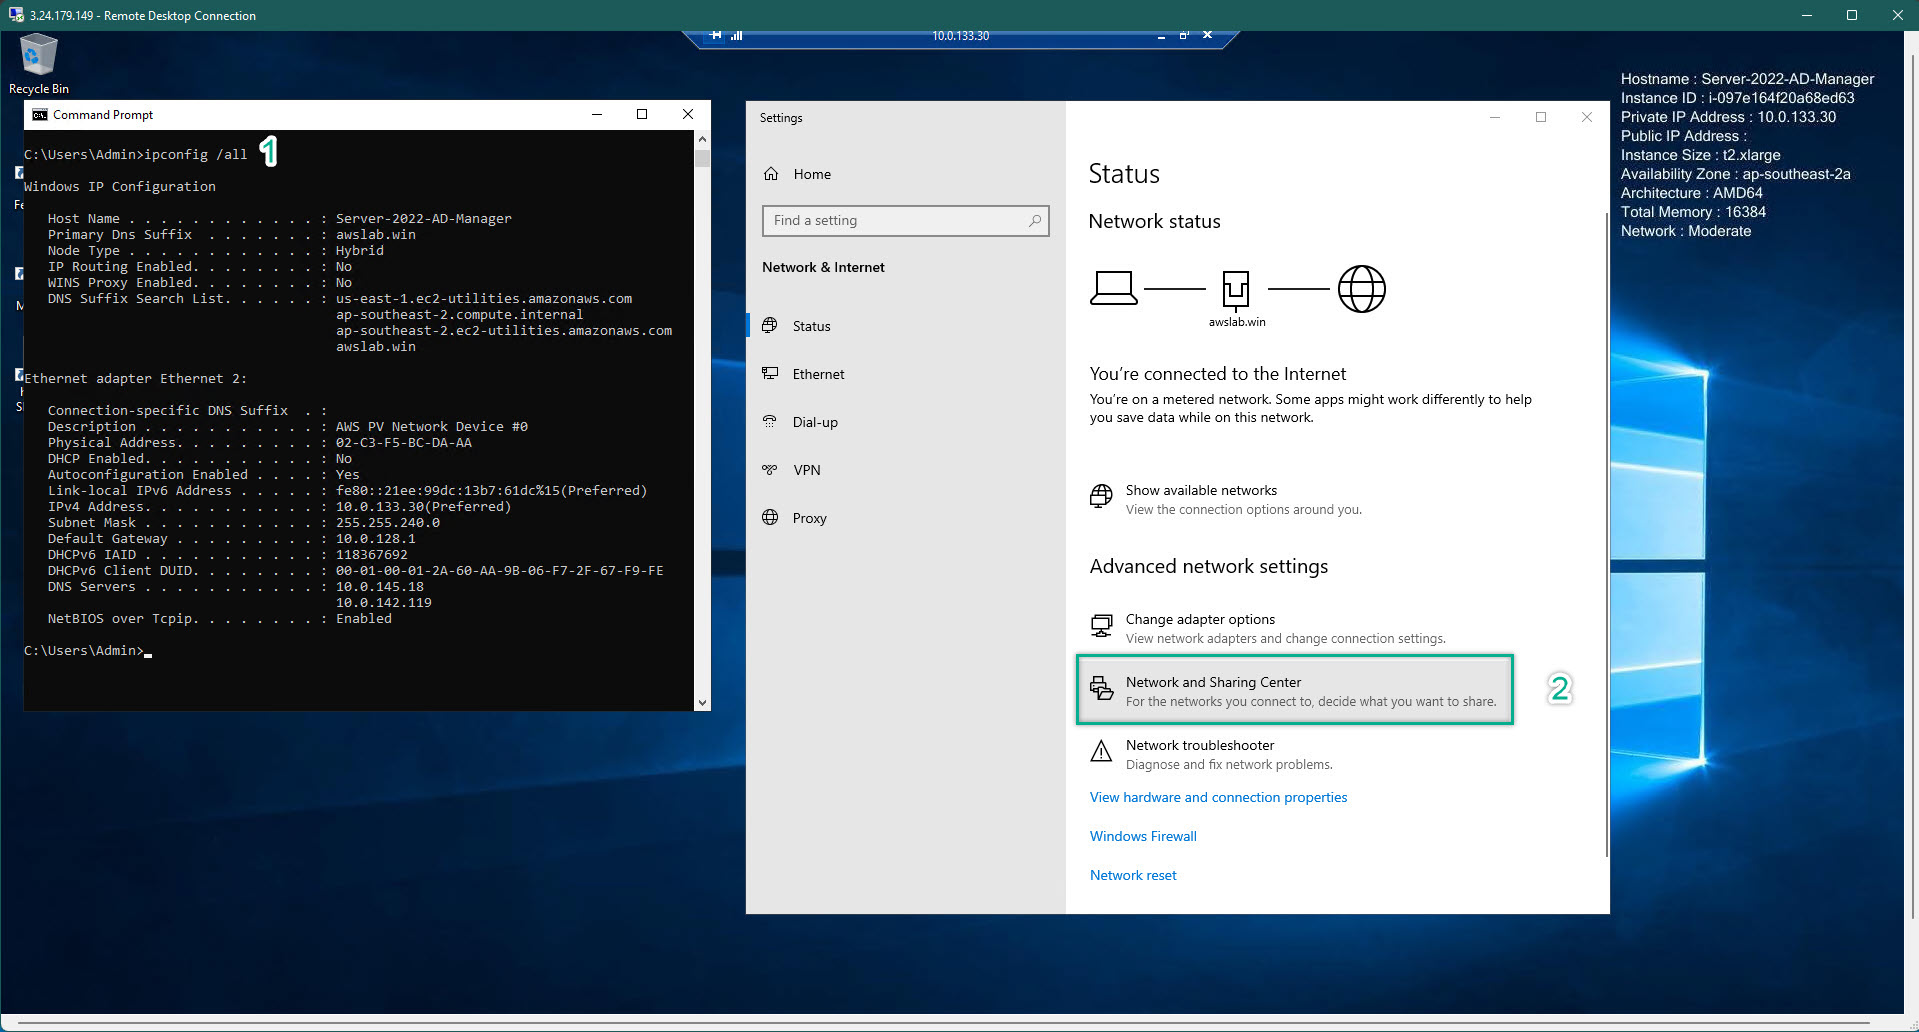
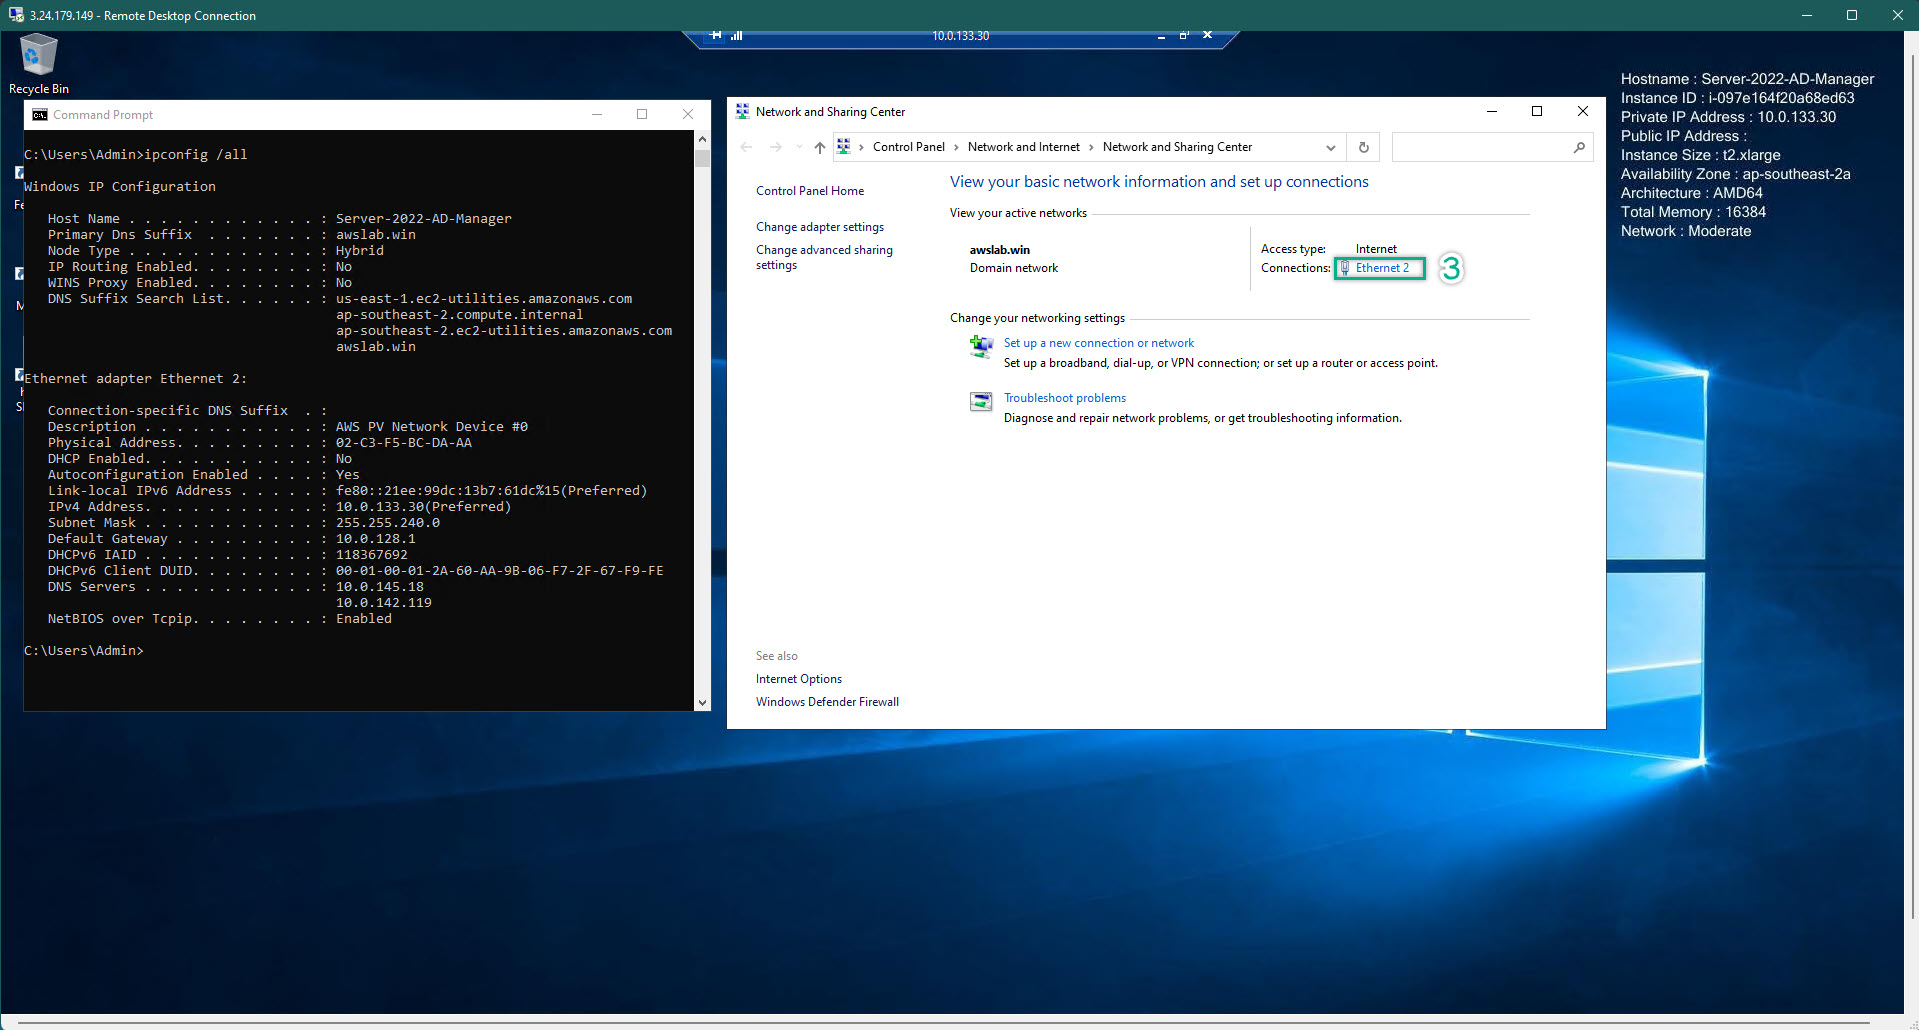
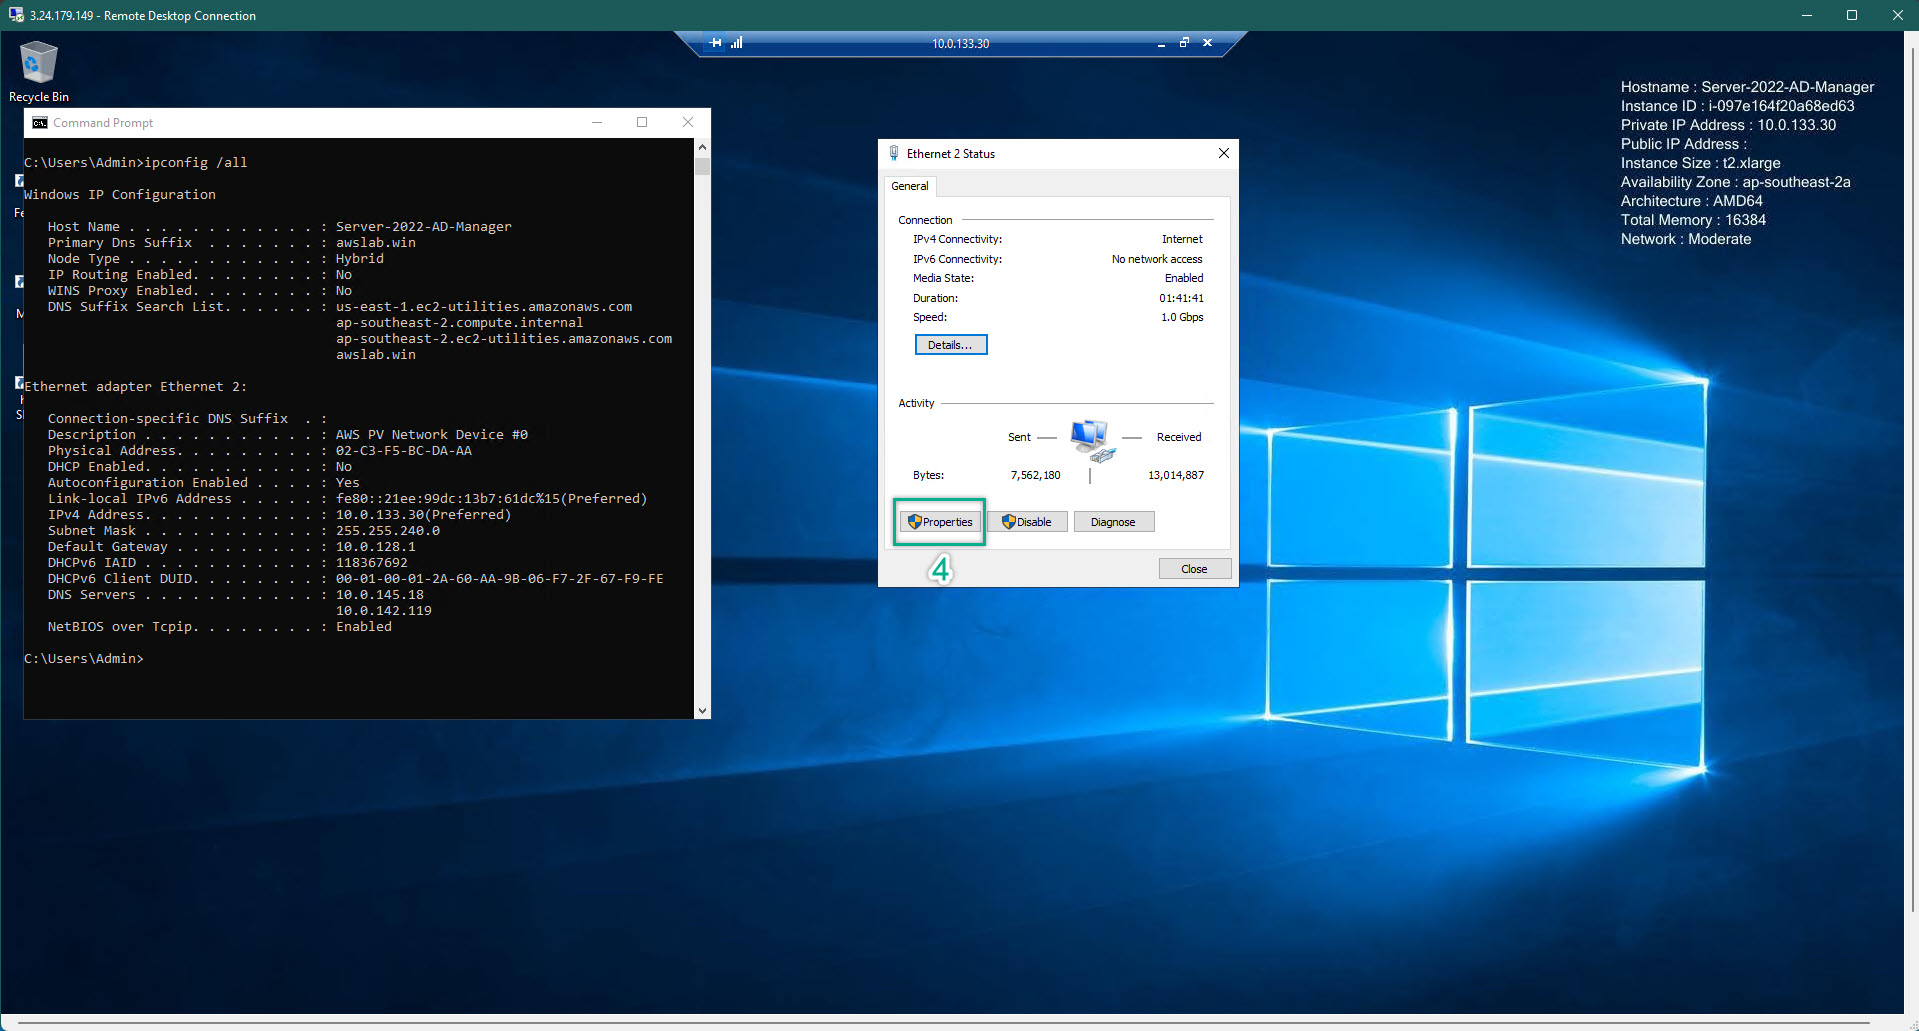
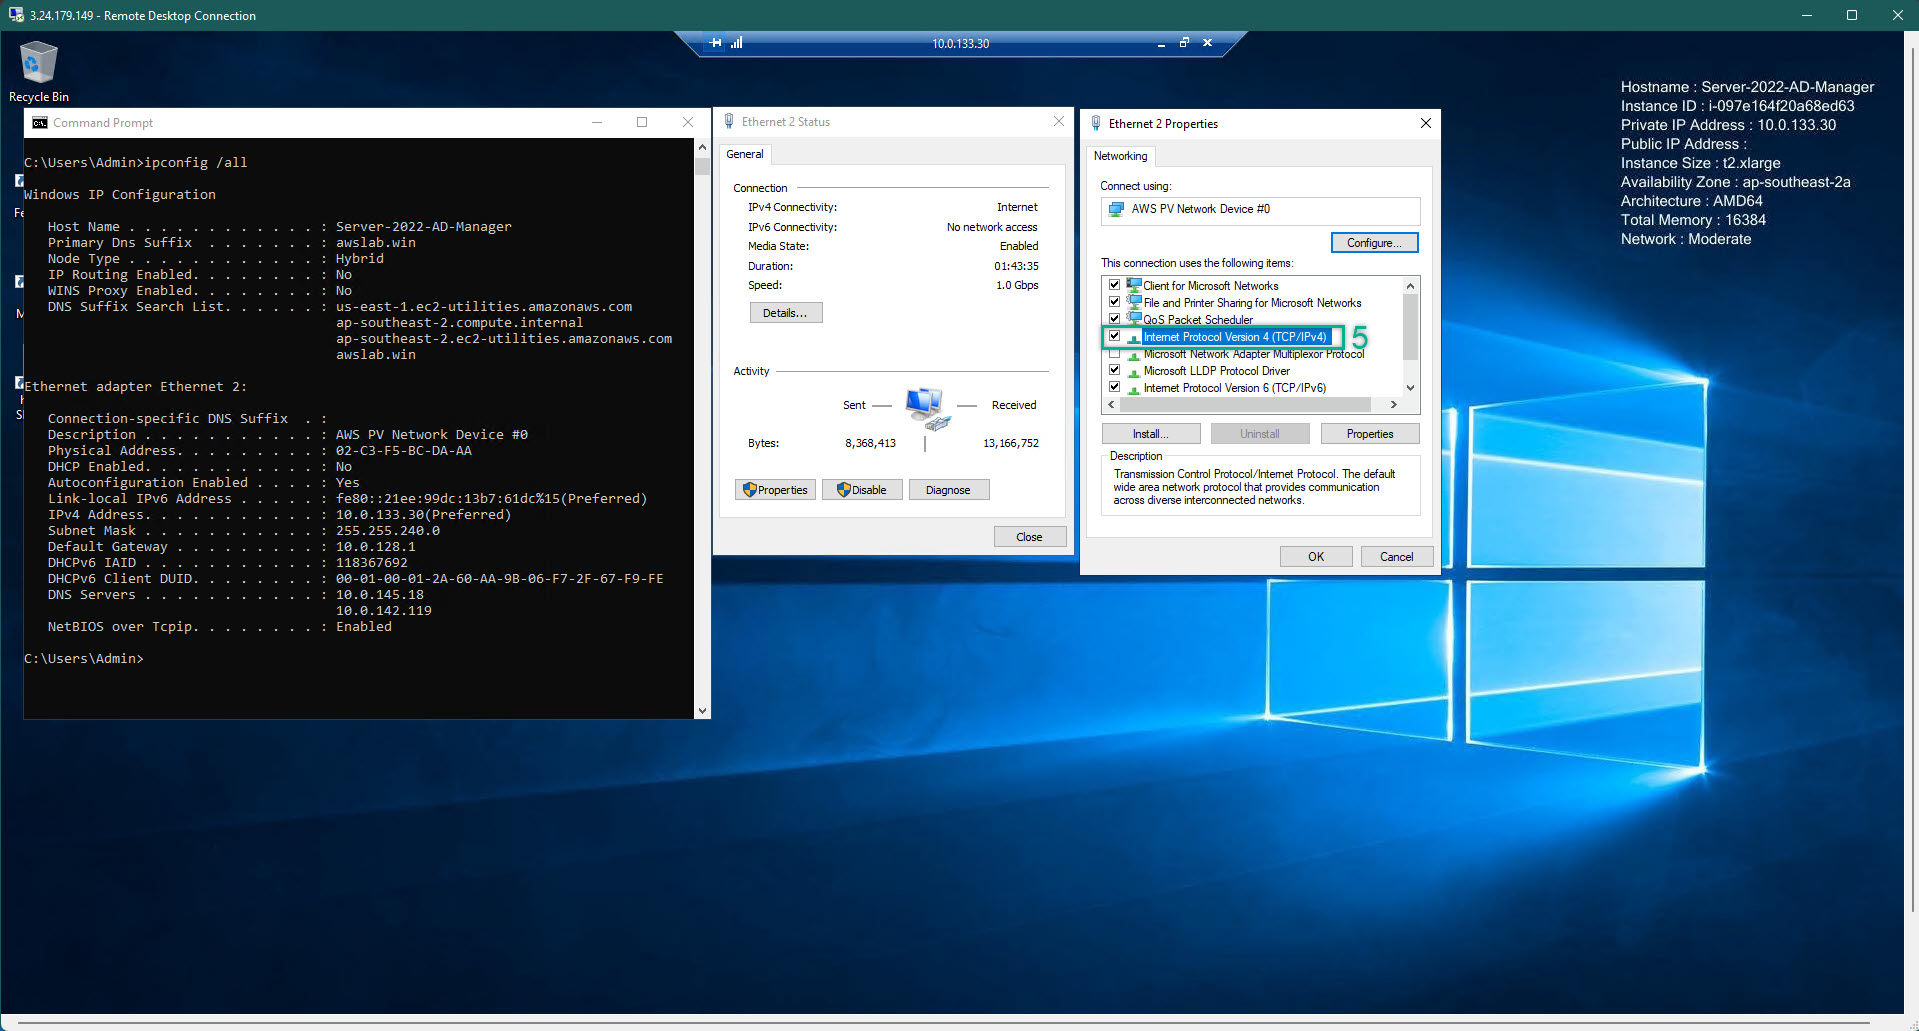
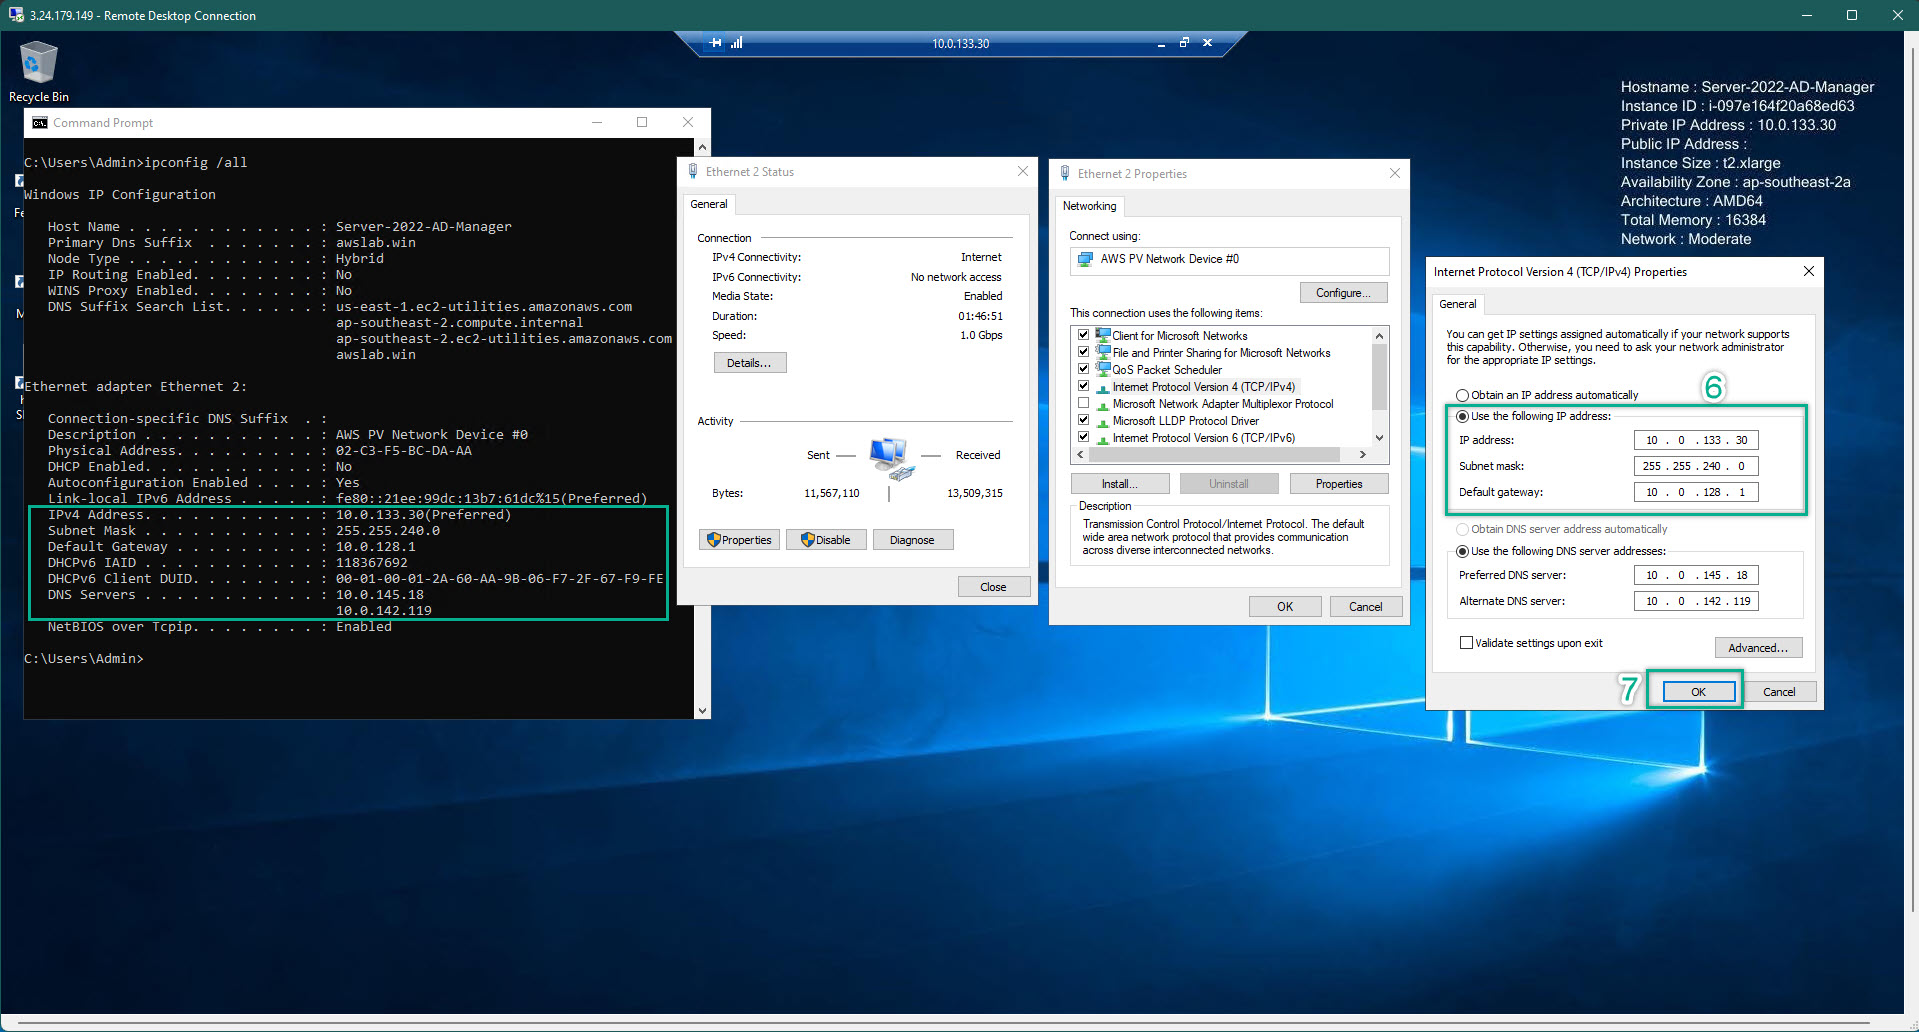
- On ALL EC2. CMD => ipconfig /all to check the ip address. Then, configure the IP address so that matched with the what showed in the command line on EACH EC2. Because of we have already joined into the domain at the creating EC2 step. Then, the DNS will be pre-filled so that matched with our created AWS Managed Directory Service
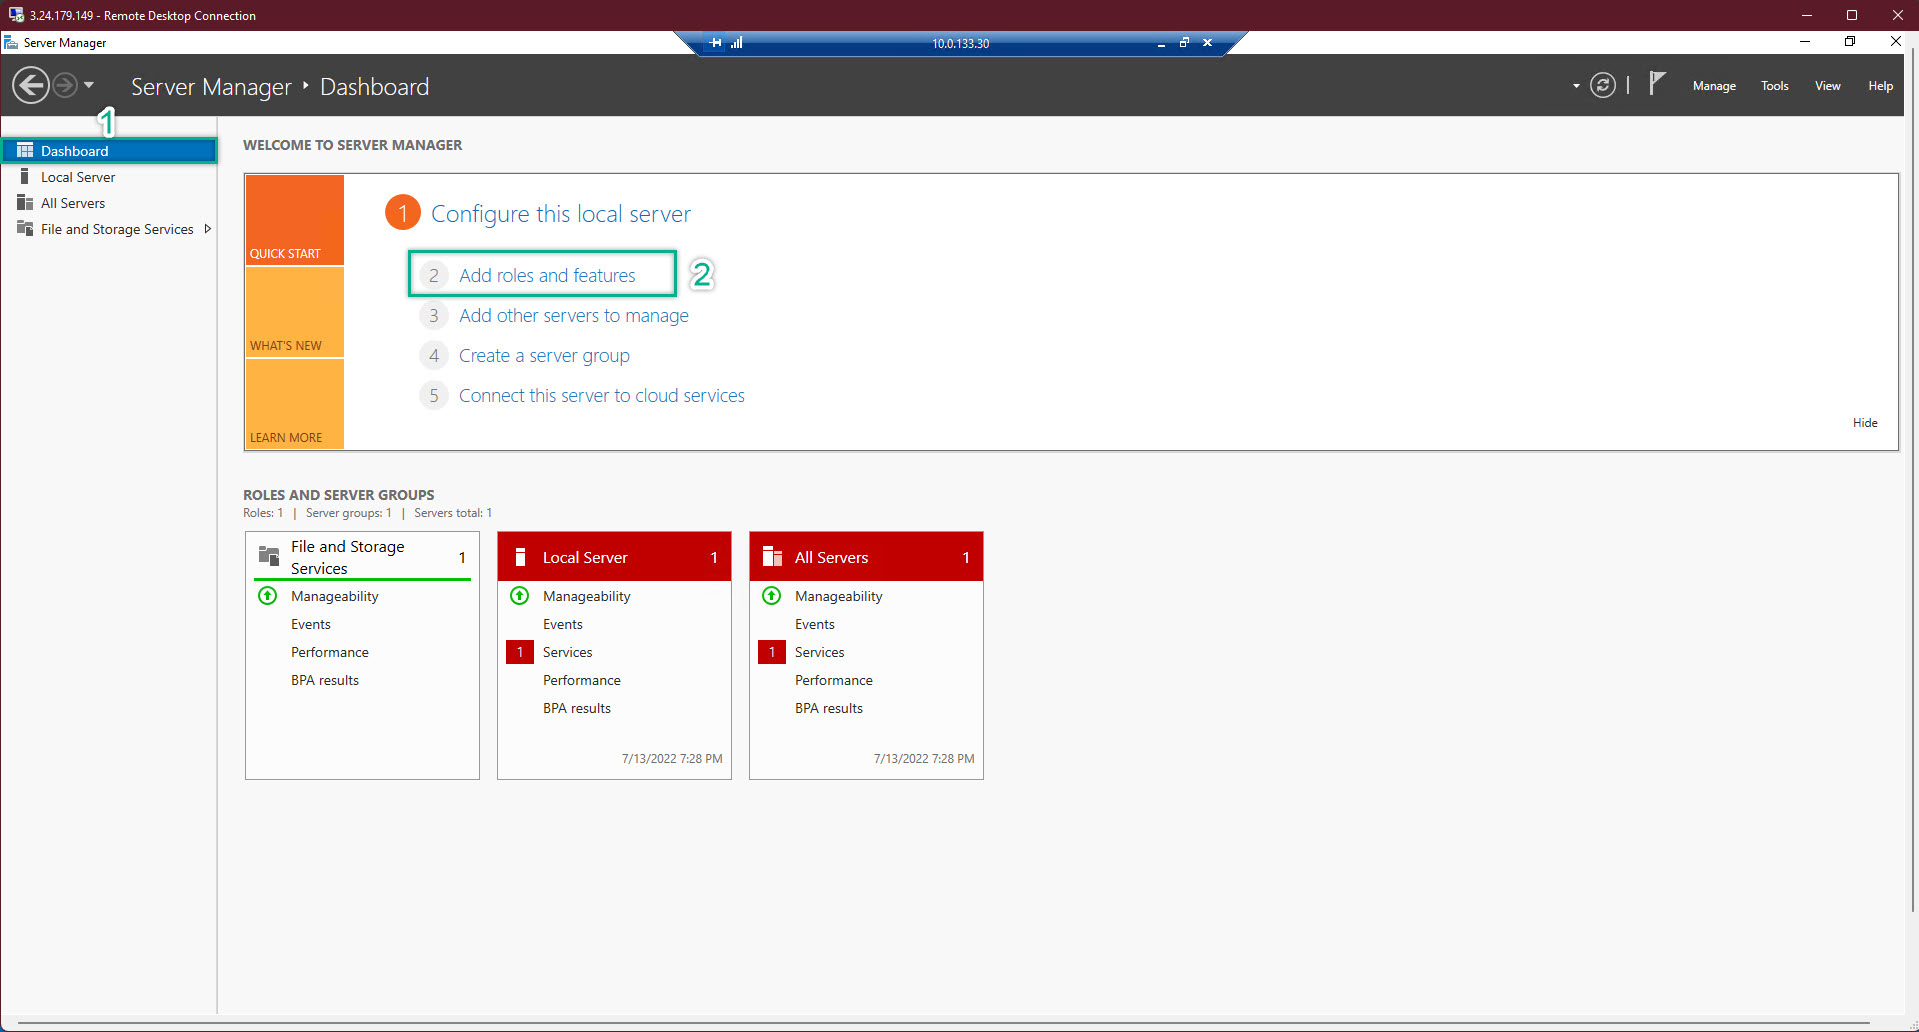
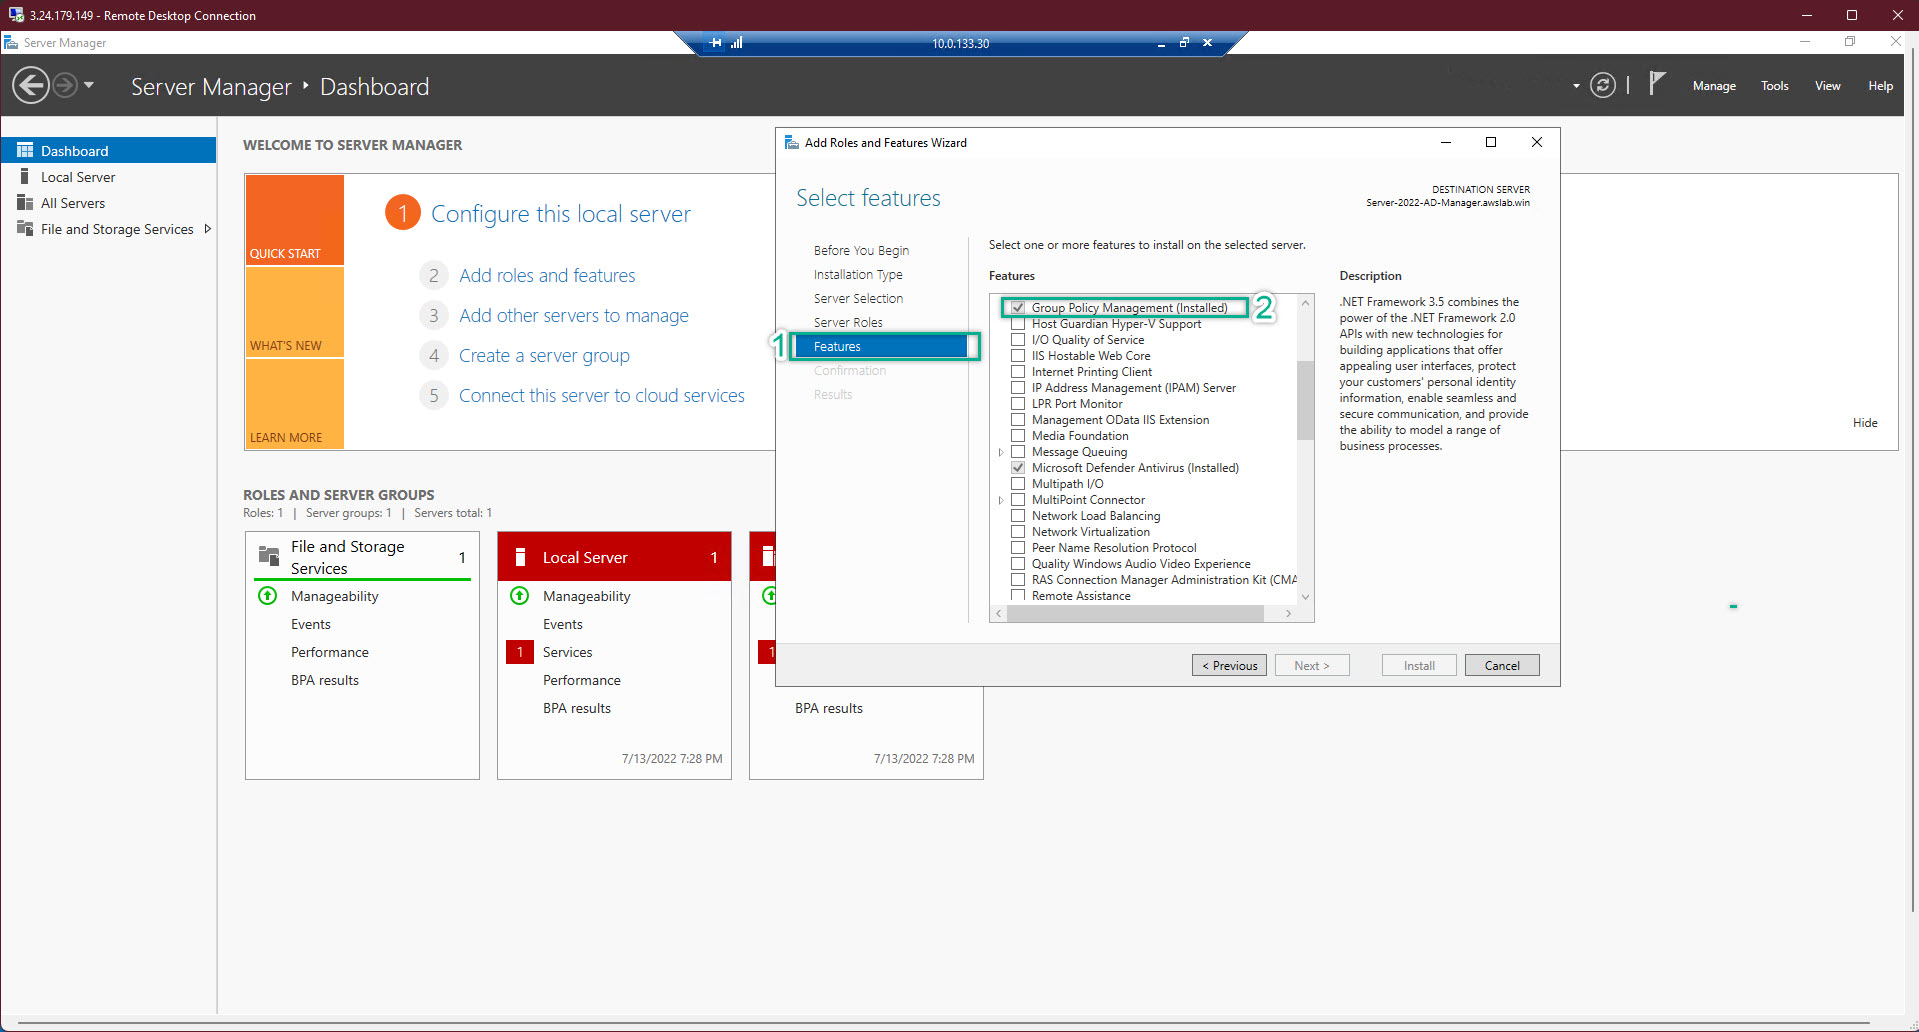
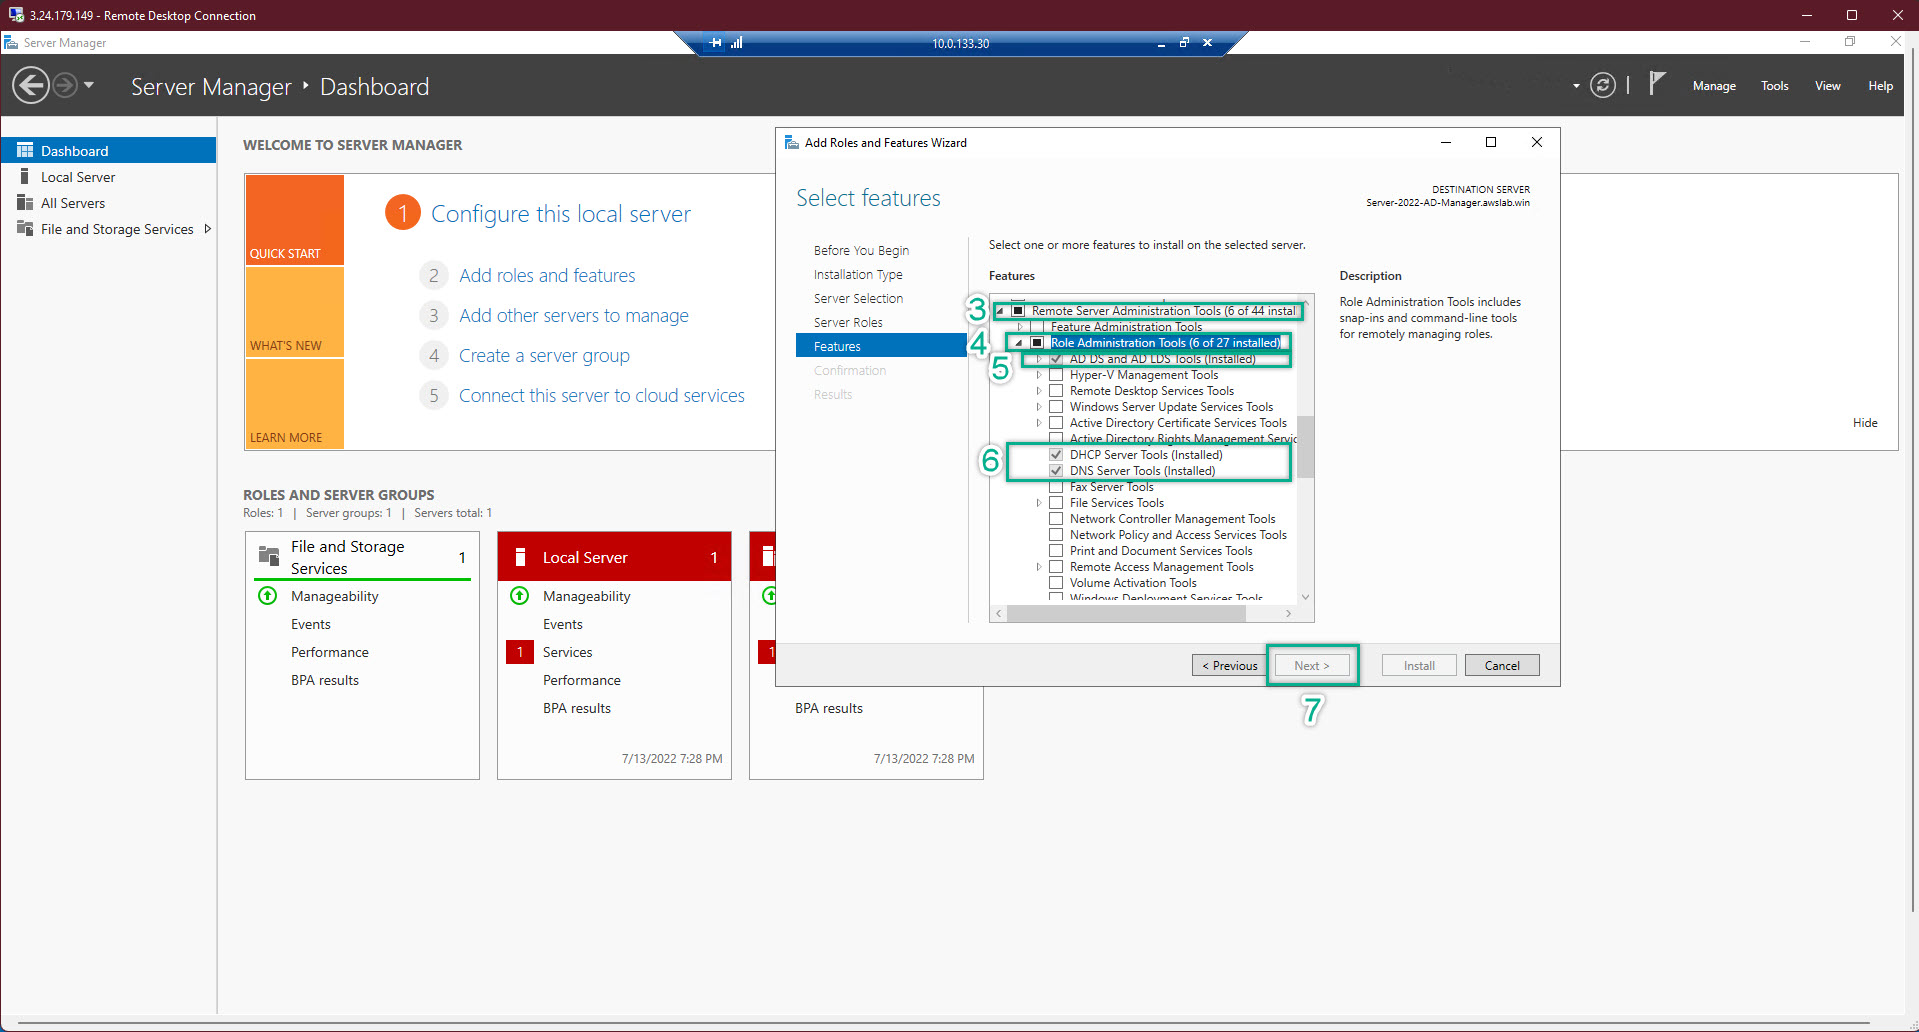
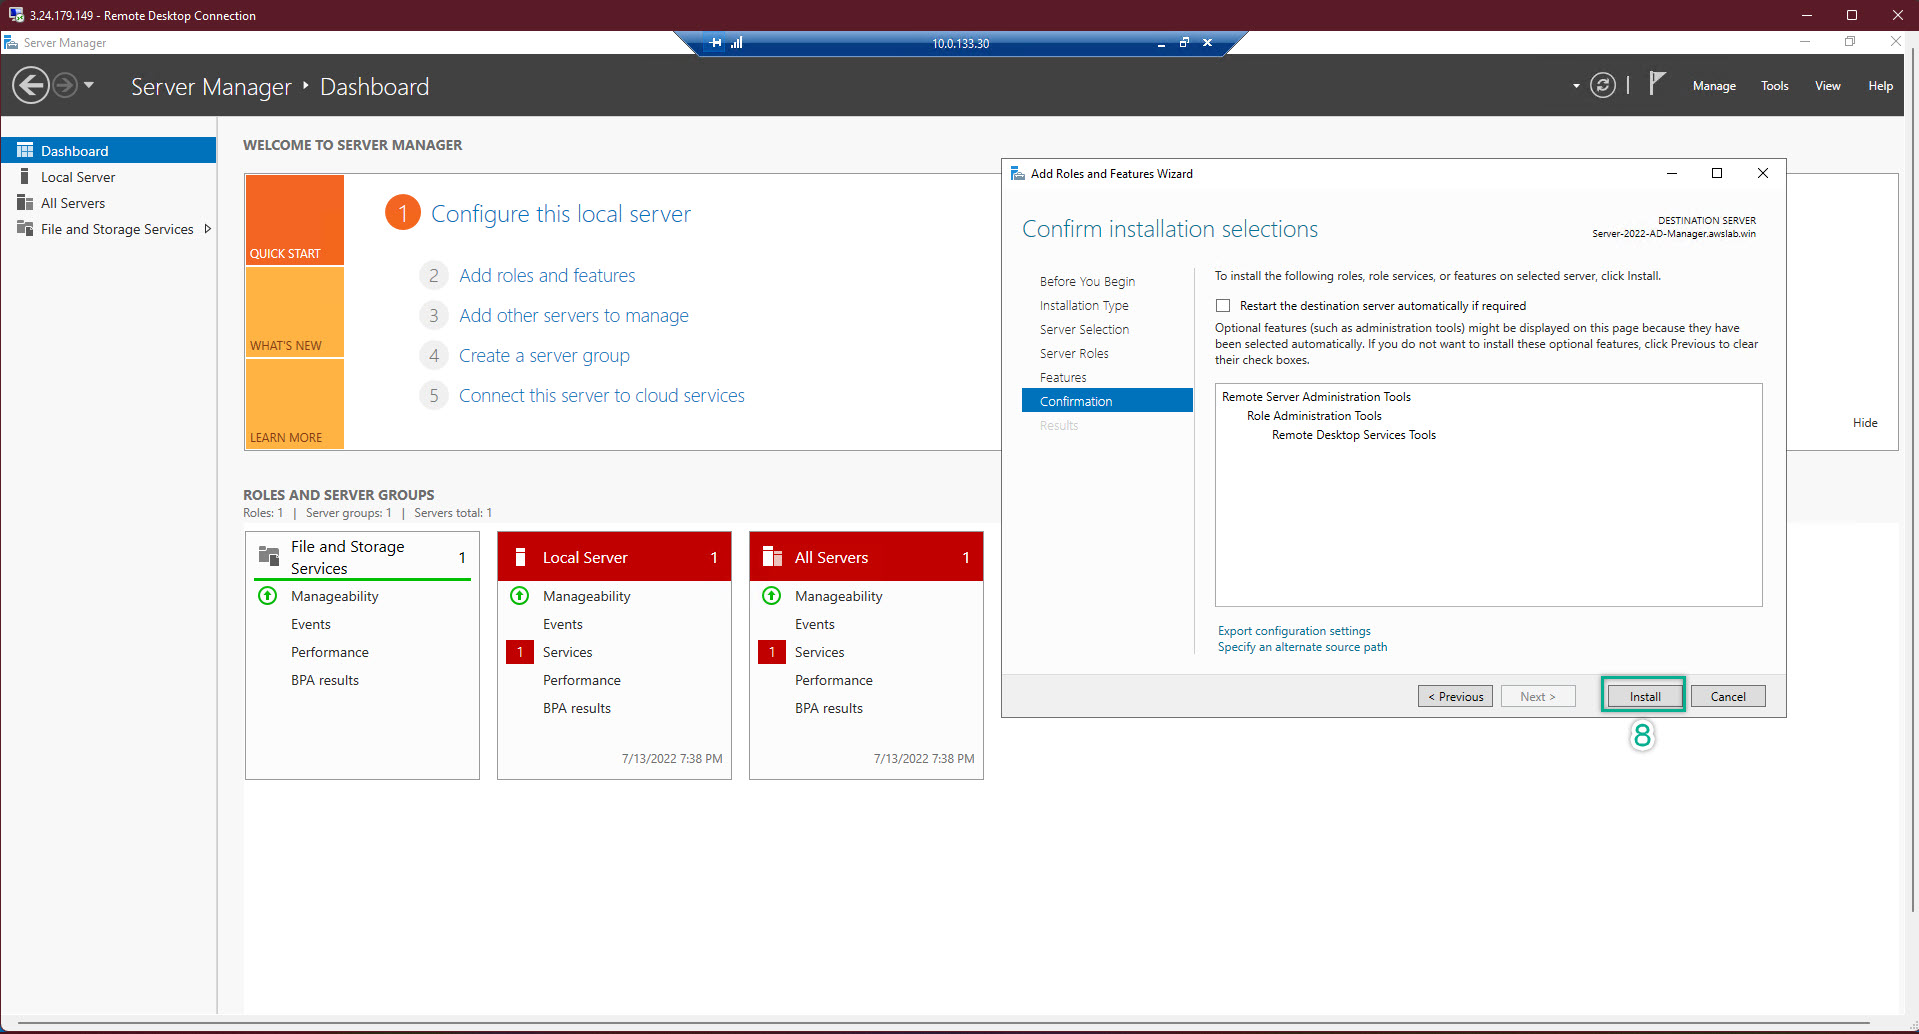
- At AD-Manager EC2 => Server Management => Add Roles and Features. After chose all the neccessary options => NEXT => Install => it might take 2 minutes
- Restart ALL EC2
- After restarted, login again and check ping in every server